One of the hooks from the book Teach Like a PIRATE that’s most memorable to me is the Board Message Hook.
In a book about engaging students, the idea of meeting students with something that’s eye-catching and thought-provoking — a statement or a picture or whatever — really resonated with me.
- Put a photo of something seemingly random on the board that eventually ties into the lesson of the day.
- Put a controversial or surprising statement on the board.
- Put a QR code on the board and see if students scan it.
The idea here is to meet students in the first moments of class with something that intrigues them and makes them want to dive deeper into the day’s work.
The traditional model for bell-ringer activities — the first activities students do before starting into the substance of the class — is to do some basic, quick questions:
- Simple problems in math
- Verb conjugations in foreign language
- Comprehension questions in English/language arts
- Review questions from the previous day’s history lesson
So, so forgettable. So easy to do without any real thinking.
Let’s come up with some bell-ringer activities that inspire students, that trigger thinking and discussion. When we pull some of the incredible digital tools available to us, we can kick these bell-ringer activities up to another level.
Here are 10 ideas for great digital bell-ringer activities (with a follow-up post of more ideas coming soon!). Whether you have digital devices for your students or not, these should stimulate some new ideas for kicking off class in an engaging way:
 1. Add speech bubbles to a historic photo. Add a new twist to a lesson by letting students speak — or think — for the characters. My favorite way to do this is with Google Drawings (for creating individual images) or Google Slides (for having each student create a slide in a shared presentation). Do an image search for a historic photo and add that photo to the drawing or slide. Then add speech bubbles. (If using Drawings/Slides, it’s in the shapes under the “callouts” category.) This is higher-order thinking! Students must know their facts and understand the people involved very well to be able to think for them. Kick the Depth of Knowledge level up even higher by having students justify their thinking and explain why they wrote what they did.
Example: Washington crossing the Delaware. Find the historic painting and add a thought bubble for Washington. (Then, add a thought bubble for a soldier too!)
 2. Ask a character/historic figure a question. What if students could ask someone they’re studying a question? What would they ask, and how would that person likely respond? This is another that can be done quickly and easily in Google Slides or Drawings. Let students take a photo of themselves using Insert > Image > Take a snapshot. Then, use the image search to find a photo of the person to whom they’ll ask the question. Add speech bubbles to ask questions. Students could ask one question with one answer from the character/historic figure, or they could do a back-and-forth with several photos.
Example: Asking Sir Isaac Newton a question about how he concluded that gravity was due to the pull from the earth.
 3. Create a flowchart. Sticking with the Google Slides/Drawings idea, have students express their understanding of a concept with a flowchart. This can easily be done with shapes and arrows (found under the line tool) in Slides and Drawings. A single line throughout a flowchart makes for more of a timeline and less of a flowchart, so any time it can branch off, the flowchart is made more interesting! (Pro tip: copy (Ctrl+C) and paste (Ctrl+V) the shapes and arrows to save time.)
Example: Go through the process of deciding what to have for lunch and all of the decisions made in that process.
 4. Make comic strips out of webcam photos. Those webcams don’t have to be just for selfie-style photos (especially those with peace fingers and duck lips …). Have students back away from the camera and pose to recreate scenes of what you’re studying. Or, have them sit side by side and have a discussion. This makes the students the stars of their own comic strips!
Example: Recreating a scene from a story or having a discussion about something they’re learning in class.
 5. Create a quick animation.Google Slides (or PowerPoint or any presentation slide tool) can be turned into a simple stop-motion animation tool. Create the first slide in your animation, then duplicate it, then move something slightly in the second slide. Duplicate the second slide and move something slightly in the third. Continue duplicating and moving until your animation is complete. Once your students have the hang of this, they can make animations pretty quickly.
Example: Recreating historic battles with moving maps (here’s a brief, incomplete example of the Battle of Little Big Horn) or showing how a math problem is completed.
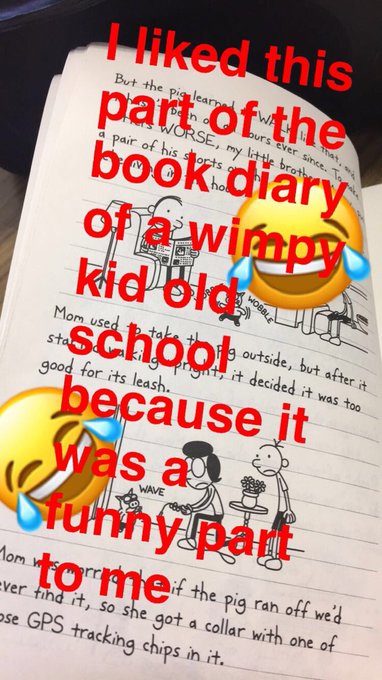
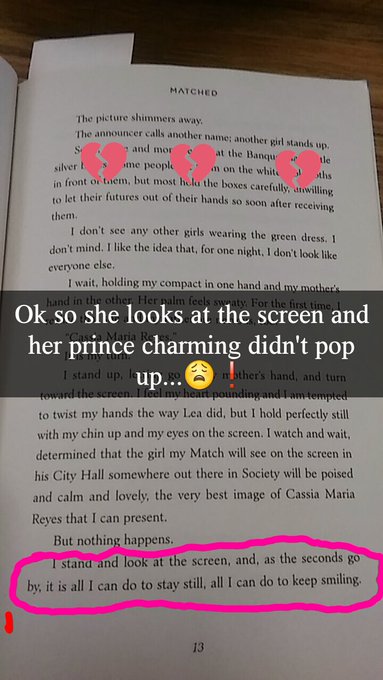
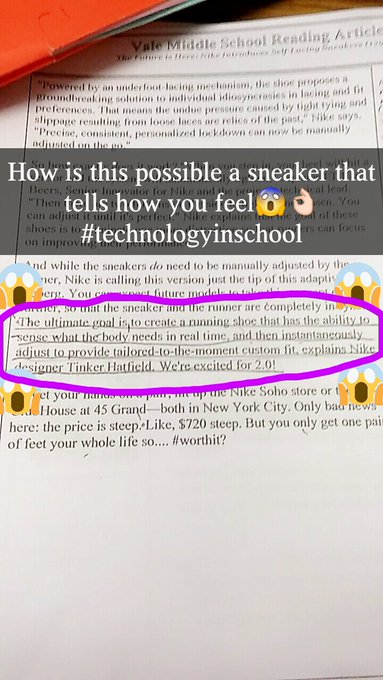
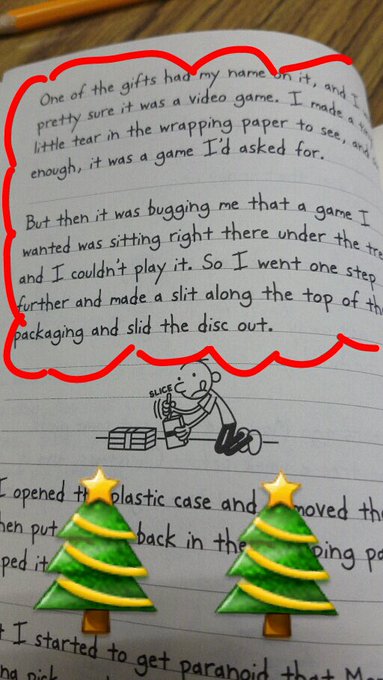
6. Create BookSnaps of what you’re reading. In BookSnaps, students find a passage from a book they’re reading that resonates with them. They snap a picture of it and annotate on it, underlining and adding text reflections and including fun things like emojis and Bitmojis (optional). There are variations of these, like MathSnaps, ScienceSnaps and even GratitudeSnaps. Snapchat is one tool many teachers and students use to create these annotations. (If you use Snapchat to do them, you don’t even have to follow each other or post it to Snapchat … just use the app to create the image!) If you don’t want to use Snapchat, a take a snapshot (Insert > Image > Take a snapshot) using Google Slides or Drawings and add the annotations. See more about BookSnaps on the Twitter hashtag (#BookSnaps).
Example: Reflect on a reading in a book with a BookSnap. Explain parts of a math problem with a MathSnap. Show what’s happening in a science lab with a ScienceSnap.
 7. Shared slide presentations.Google Slides doesn’t have to be used just to do presentations in front of the class! Create a slide presentation with enough slides for each student in the class. Then share that slide presentation with the class using the blue “Share” button. (Be sure to use the “Get shareable link” button and choose “Anyone with the link can edit” or “Anyone from <your school district> can edit” from the dropdown menu.) Each student gets a slide where he/she can do his/her own work. But you’re also creating a whole class file. Students love to see what each other has put on the other slides, and it’s a great place to interact through comments. Here’s a shared slide presentation I did in a workshop where participants wrote about their ideal vacation destination.
Example: Finding quick facts/photos online about a topic you’ll discuss in class that day.
8. Ask students “What if …” using a Flipgrid video grid. It’s always fascinating to see what students imagine when their minds are allowed to wander. An educator from Australia, Bronwyn Joyce, has gotten in the habit of asking her students — and students around the world — “What if?”. Her prompts have elicited more than 1,000 videos and have prompted interesting discussions about the world’s problems. On a smaller scale (in the classroom with just your students), this can be an interesting way to kick off a class.
Example: Letting students speculate what would happen if history was different, or if a character did something differently in a story, or what they would do if …
 9. Share cell phone photos to a slide presentation with DriveSlides. This one is a little more advanced, but once it’s set up, it’s pretty easy! Students can email you photos from their cell phones and, in less than a minute, you can pull them into a Google Slides presentation to share with the class! Here’s how you do it:
- Log in to Google with the email account where you want students to send emails. (Don’t want these student photos clogging up your inbox? Use a different email OR create a new Gmail account just for this purpose — collecting student photos!)
- Create a new Google Sheets spreadsheet and install the Save Emails and Attachments add-on to that sheet. (Add-ons > Get add-ons … > Search and install it)
- In that spreadsheet, in the menu, go to: Add-ons > Save Emails and Attachments > Create New Rule …
- It will display lots of ways that the add-on can decide which emails to search for photos. I usually just add something in the “Subject:” line … a unique word I want students to type in the subject line when they send me their photos (like “spanishphoto” … something no one will write except students sending me photos).
- On #2 in this new rule, be sure to check “Save file attachments” and uncheck “Save email body.”
- Choose a folder where you want it to save all of your photos. (You may need to create a new folder just for this in Drive before you click the “Select Drive Folder” button.)
- Click Save. Your rule is set!
- Have students email you their photos. Make sure they put the unique word in the subject line.
- Once they photos are in, go back to your spreadsheet and go to Add-ons > Save Emails and Attachments > Manage Rules. Click the blue “Run” button. (Note: It may take a while to download all of those images to your Google Drive. Maybe have students submit photos the night before and then download them right before class or the morning before class.)
- Install the DriveSlides extension from your Google Chrome browser.
- After the add-on has downloaded all of the photos, go to your Google Drive (drive.google.com) and open the folder with all of the photos.
- With that Google Drive folder open, click the DriveSlides button in the top right corner of your Google Chrome browser. (It looks like a little yellow Google Slides icon with the Google Drive icon inside it.)
- BOOM. DriveSlides takes all of those photos from your folder and instantly sticks them into a new slide presentation for you.
If you’ve done this before and want to do the activity again, follow these steps:
- Open your spreadsheet and go to Add-ons > Save Emails and Attachments > Manage Rules.
- Click to edit the rule you already created.
- Change the word in the subject line to something different (maybe “spanishphoto2” or “may14”).
- Delete all of the photos from the folder in your Google Drive.
- After students have sent photos with that subject line, click “Add-ons” > Save Emails and Attachments > Manage Rules and click “Run” to download photos.
- Open the Google Drive folder and click the DriveSlides button to send photos to a new slide presentation.
Example: Students can take photos of the world around them with examples of what you’re studying in class. This pulls all of those student-created photos into a slide presentation you can share with the class.
 10. Do a shared mind map brainstorm with AWWApp. Students can interact in a shared whiteboard in AWWApp (awwapp.com). They can draw with their finger (or a mouse or a laptop/Chromebook touchpad). If you have a touchscreen available, this is a really easy, collaborative way for students to sketch out and share their ideas. Because the whiteboards are collaborative, they can share whiteboards with others — students in other classes or anyone around the world — so they can collaborate together.
Example: Jot down all of the words that best describe a character. Write out all of the questions they have about solving a certain kind of math problem.
Question: What are your best bell-ringer activity ideas? Describe them in a comment for us so we can use them, too! You can leave a comment by clicking here.
For notifications of new Ditch That Textbook content and helpful links:
- like Ditch That Textbook on Facebook
- follow @jmattmiller on Twitter
- check out the #DitchBook community on Twitter
- follow Ditch That Textbook on Pinterest
- follow +MattMiller16 on Google+!
Interested in having Matt present at your event or school? Contact him by e-mail!
Matt is scheduled to present at the following upcoming events:
| Date | Event / Event Details | City / More Info | ||
|---|---|---|---|---|
| 09/16/2017 9:00am-4:00pm | Indiana State Reading Association | Noblesville, IN | ||
| Venue: | Noblesville High School 18111 Cumberland Road Noblesville, IN | Public Event | ||
| 10/03/2017—10/04/2017 | "The Digital PIRATE - Ditch That Textbook" | |||
| 10/06/2017 8:00am-3:00pm | GooglePalooza | Vandalia, IL | ||
| 11/07/2017 8:00am-3:00pm | Goshen Local Schools | Goshen, OH | ||
_________________________________________________________________________________


_________________________________________________________________________________
_________________________________________________________________________________


_________________________________________________________________________________
_________________________________________________________________________________


_________________________________________________________________________________


